Configure Dokploy for Open Telekom Cloud
This part of the blueprint explains how to configure Dokploy for use with Open Telekom Cloud. After deploying Dokploy, you need to integrate it with cloud services and external components to make the platform fully operational. The configuration steps covered in this guide include setting up container registries, defining S3-compatible storage destinations, assigning a server domain, updating the web server IP address, and connecting to a Git provider. Each of these steps ensures that Dokploy can interact seamlessly with Open Telekom Cloud resources and external systems, enabling you to build and manage applications efficiently.
All of the following steps must be configured for Dokploy to function correctly on Open Telekom Cloud.
Configuring Registries
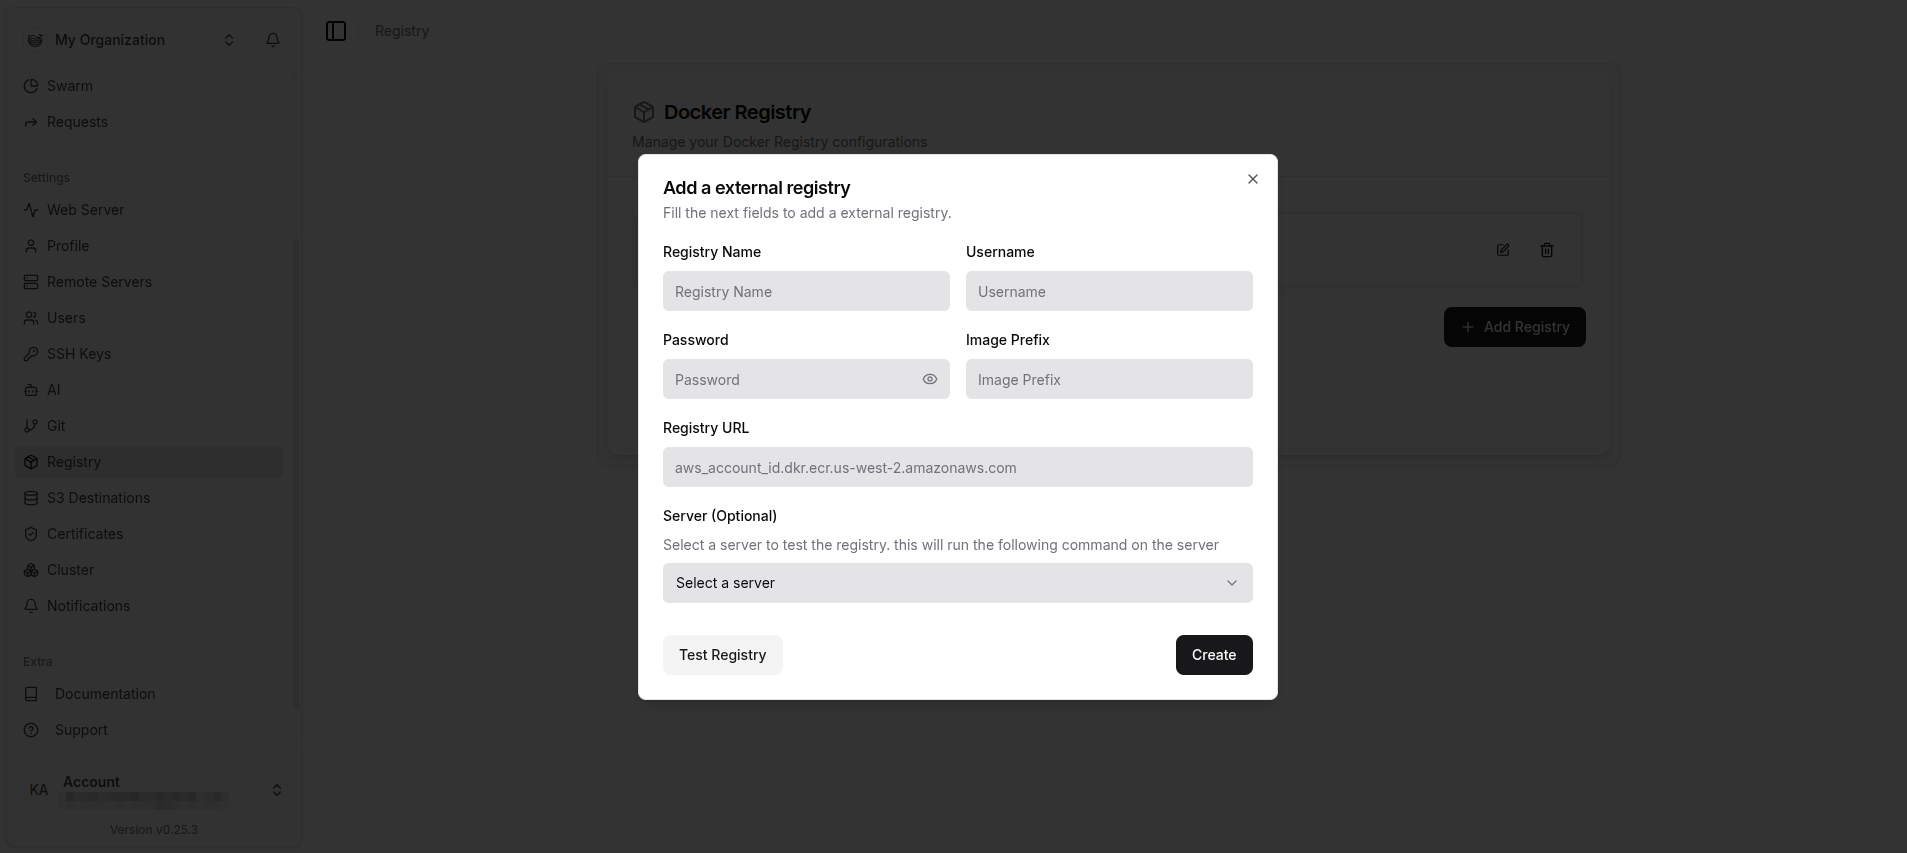
To use Dokploy effectively on Open Telekom Cloud, you must connect it to a container registry. In the registry is where application images will going to be stored, versioned, and retrieved during deployments. Dokploy needs this integration to push newly built images and to pull the correct versions when running applications. On Open Telekom Cloud, the Software Repository for Containers (SWR) is typically used, but external registries such as Docker Hub or GitHub Container Registry can also be configured, although SWR is highly recommended for tighter integration with the rest of the Open Telekom Cloud ecosystem and managed services. This step ensures that Dokploy can access images securely and deliver applications in a consistent and automated way.
The first step is to obtain a long-term SWR token, which you can generate by following the provided guide: Obtaining a Long-Term Valid Docker Login Command.
Go to Dokploy Console -> Settings -> Registries and click Add Registry and fill in the values and click OK.
Adding a Server Domain
Dokploy requires a server domain to provide a consistent and secure entry point for deployed applications. The domain should resolve to the public IP address of your Elastic Load Balancer. Once set, Dokploy uses this domain to assign subdomains to applications, route traffic through its reverse proxy, and manage TLS certificates for HTTPS access. This configuration ensures that applications are accessible under predictable URLs and can be secured with SSL termination.
Go to Dokploy Console -> Settings -> Web Server, set the Domain to dokploy.example.com and click Save.

Do not enable automatic SSL certificate provisioning in Dokploy when running on Open Telekom Cloud. TLS termination is already handled at the Elastic Load Balancer (ELB) level, which manages certificates and forwards plain HTTP traffic to Dokploy. Allowing Dokploy to request its own certificates would cause conflicts and may result in failed renewals, because Let’s Encrypt challenges cannot complete reliably behind the load balancer. Keeping certificate management centralized at the ELB ensures stable and predictable HTTPS access for all applications.
Updating the Web Server's IP Address
The Server IP shown in Dokploy under Web Server reflects the node’s own outbound address, which in Open Telekom Cloud usually resolves to the NAT egress EIP. This value is detected locally and does not represent the actual entry point for external traffic. In production, applications are reached through the Elastic Load Balancer (ELB), which has its own public EIP. For correct operation, always configure your server domain to resolve to the ELB’s EIP, since this is the address exposed to clients and used for routing and TLS termination.
Go to Dokploy Console -> Settings -> Web Server -> Web Server, click Server -> Update Server IP and set Server IP to the EIP of the ELB and click Update.

Connecting a Git Provider
Dokploy requires a connection to a Git provider to automate application delivery. By linking a repository, Dokploy can pull source code, build container images, and trigger deployments directly from commits. This integration keeps applications synchronized with the latest code changes and enables a consistent CI/CD workflow. Supported providers include GitHub, GitLab, Bitbucket and Gitea which can be connected through personal access tokens or service accounts.

Follow the instructions for your chosen provider, enter the required details, and then click Configure.
Configuring S3 Destinations
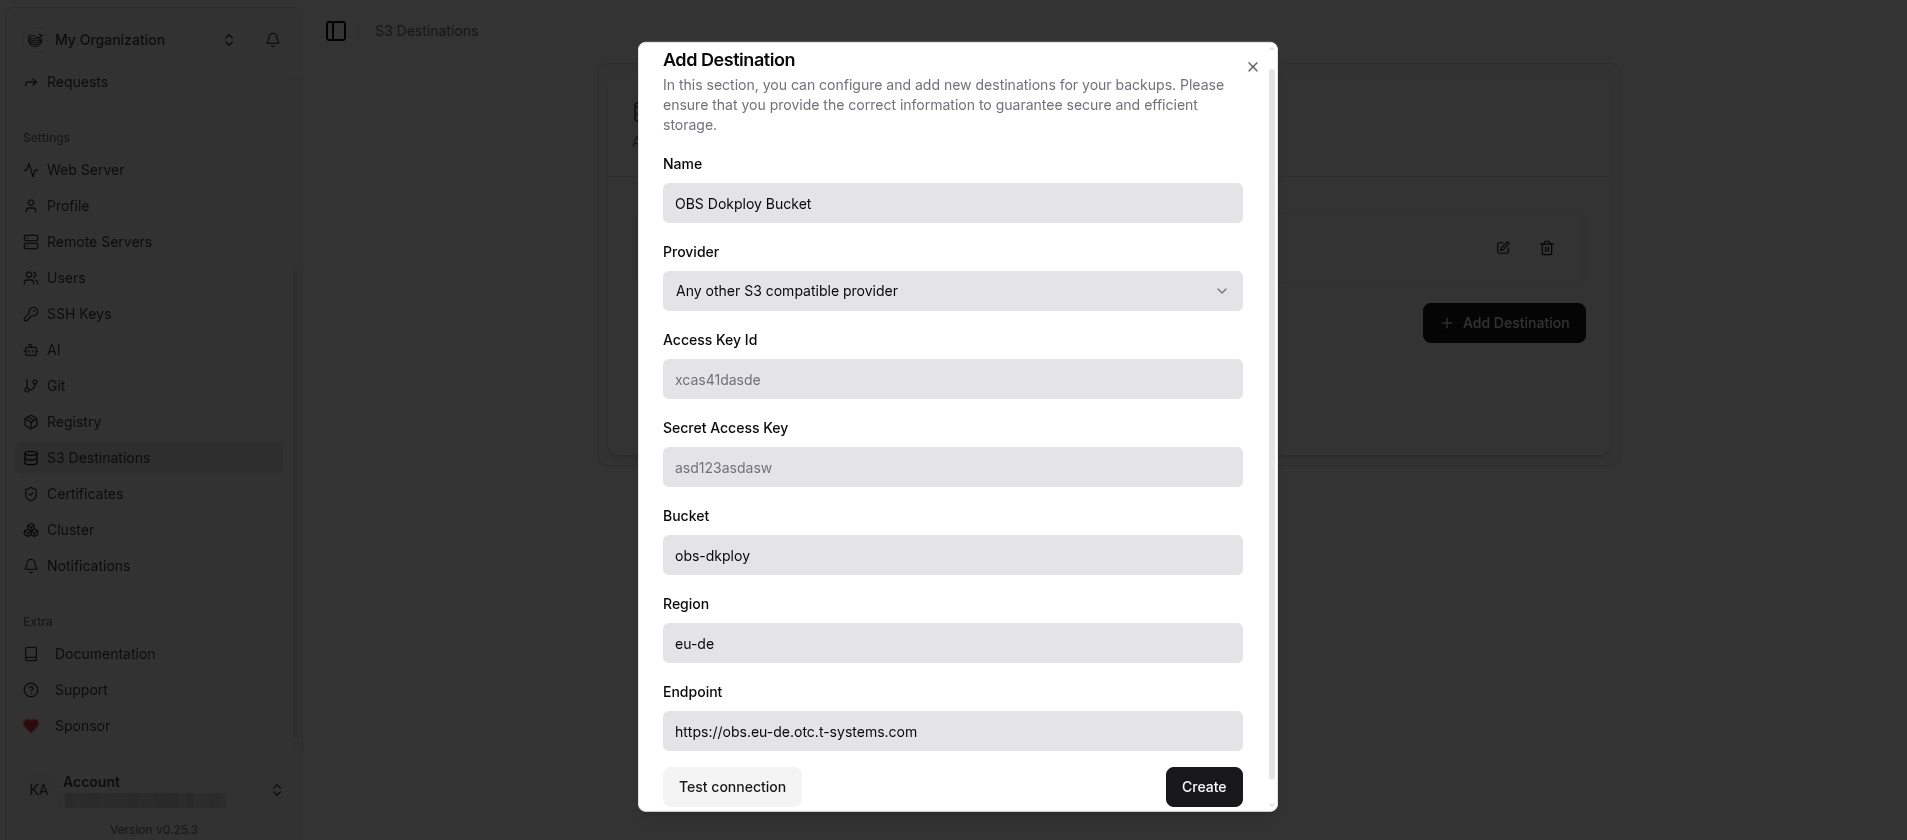
To ensure persistent storage and reliable backups, Dokploy requires an S3-compatible destination. On Open Telekom Cloud, this is the Object Storage Service (OBS), which exposes an S3 API. By connecting Dokploy to an S3 destination, application data, logs, and backups can be stored outside of the container lifecycle, making them durable and recoverable across deployments. This configuration allows Dokploy to manage stateful workloads more reliably and ensures that important data is not lost when containers are restarted or replaced.
Go to Dokploy Console -> Settings -> S3 Destinations and click Add Destination. Configure it with the following settings and click OK:
Setting up a Backup Schedule
Creating a backup schedule in Dokploy is essential to safeguard application databases and other persistent data. Containers and nodes can be restarted or replaced at any time, which makes local storage unreliable. By scheduling backups, Dokploy automatically exports data to an external S3-compatible service such as Open Telekom Cloud OBS, ensuring that recent restore points are always available. This protects against data loss during upgrades, configuration changes, or unexpected failures and provides a reliable way to recover critical information.
Dokploy backups work only when PostgreSQL runs as a container managed by the platform, since Dokploy can execute dump operations directly inside the container. Because in this blueprint we use Open Telekom Cloud RDS, backups must be handled through the RDS service itself, because Dokploy cannot access the managed database process. In this case, make sure to configure a backup schedule in RDS to ensure data protection and recovery options remain in place.
For detailed instructions, see Configuring an Automated Backup Policy.