Deploy Applications with Dokploy
The final part of this blueprint describes how to deploy highly available user workloads with Dokploy on Open Telekom Cloud, positioning it as an open-source alternative to platforms such as Vercel, Netlify, Azure App Services and AWS Elastic Beanstalk.
Before we deploy any application with Dokploy we first need to create a Project. Go to Dokploy Console -> Home -> Projects and click Create Project, give it a name and click Create.
Deploying a Docker Stack
Simple Application
Open the created project and click Create Service -> Docker Compose. Fill in the Name, in this case whoami as we are going to install the traefik/whoami application, a Go server that prints OS information and HTTP request to output. Choose Stack as Compose Type and click Create:

Go to General and disable Auto-deploy, click Raw, paste the following YAML in the text area and click Save:
version: "3.8"
services:
  whoami:
    image: containous/whoami:v1.5.0
    deploy:
      replicas: 1
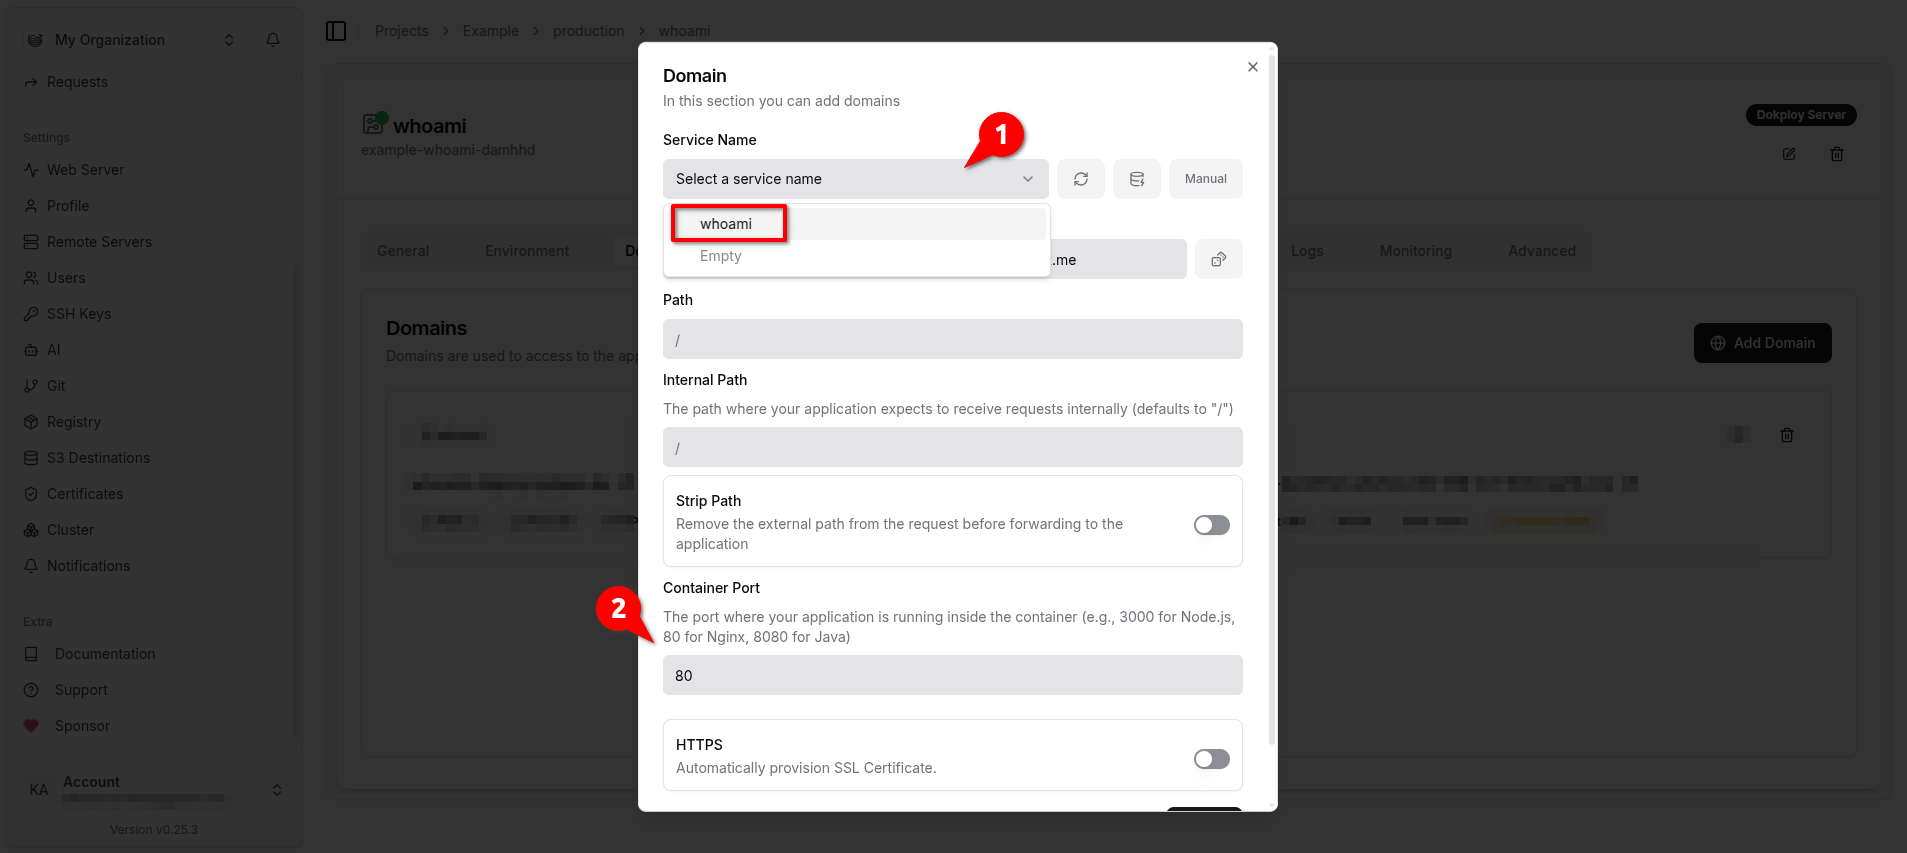
Go to Domains and click Add Domain. Select the service, in this case there is only one, namely whoami, from the Service Name drop-box and set Container Port to 80 (that should always be the port that container is listening to and not a custom one that you would like to expose the service to).
Keep HTTPS disabled because TLS is terminated at the Elastic Load Balancer.
Next, define the Host URL. You can choose between a testing address or one intended for production workloads. Clicking the dice button on the right, generates a random URL from the traefik.me service and sets it as your Host. This is suitable for testing, as it does not support SSL certificates.

Traefik.me is a wildcard DNS service, similar to nip.io or xip.io, that resolves any IP address.
For production, you can use whoami.dokploy.example.com, assuming that dokploy.example.com was configured as the Web Server Domain Address in the earlier steps.
Finally, click Create, go back to General, and select Deploy. If the configuration is correct, your workload will be deployed on the worker nodes of the swarm and both endpoints should now be accessible:

Applications under your domain are secure because TLS is terminated at the ELB with a wildcard certificate that covers *.dokploy.example.com. When a user visits any app like whoami.dokploy.example.com, the certificate’s SAN matches the hostname, the chain validates, and the browser marks the session as secure.
Multi-Service Application
The previous example was simplified. Next, we will demonstrate how to deploy a Docker stack with multiple interdependent services that require more advanced configuration. Open the created project and click Create Service -> Docker Compose. Fill in the Name, in this case typesense, choose Stack as Compose Type and click Create. In this example we are going to deploy the following services:
- A single-node Typesense server.
- A Typesense Dashboard to manage and browse collections.
- A Typesense DocSearch Scraper, customized to index data in Typesense from an external Docusaurus site.
- A Docker Job Scheduler that will trigger the scraper every 5 minutes.
Go to General and disable Auto-deploy, click Raw, paste the following YAML in the text area and click Save:
version: '3.8'

services:
  typesense:
    image: typesense/typesense:30.0.rc10
    networks:
      - dokploy-network
    volumes:
      - typesense-data:/data
    environment:
      TYPESENSE_API_KEY: ${TYPESENSE_API_KEY}
      TYPESENSE_DATA_DIR: /data
      TYPESENSE_ENABLE_CORS: "true"

  dashboard:
    image: bfritscher/typesense-dashboard
    networks:
      - dokploy-network
    environment:
      VITE_AUTH_ENABLED: "false"

  docsearch-scraper:
    image: typesense/docsearch-scraper:0.12.0.rc13
    networks:
      - dokploy-network
    deploy:
      replicas: 1
      placement:
        constraints:
          - node.role == worker
    depends_on:
      - typesense
    environment:
      CONFIG: |
        {
          "index_name": "${SCRAPER_COLLECTION_INDEX}",
          "start_urls": [
            "https://${SCRAPER_TARGET_HOST}/"
          ],
          "sitemap_urls": [
            "https://${SCRAPER_TARGET_HOST}/sitemap.xml"
          ],
          "sitemap_alternate_links": true,
          "stop_urls": [
            "/tests"
          ],
          "selectors": {
            "lvl0": {
              "selector": "(//ul[contains(@class,'menu__list')]//a[contains(@class, 'menu__link menu__link--sublist menu__link--active')]/text() | //nav[contains(@class, 'navbar')]//a[contains(@class, 'navbar__link--active')]/text())[last()]",
              "type": "xpath",
              "global": true,
              "default_value": "Documentation"
            },
            "lvl1": "header h1",
            "lvl2": "article h2",
            "lvl3": "article h3",
            "lvl4": "article h4",
            "lvl5": "article h5, article td:first-child",
            "lvl6": "article h6",
            "text": "article p, article li, article td:last-child"
          },
          "strip_chars": " .,;:#",
          "custom_settings": {
            "separatorsToIndex": "_",
            "attributesForFaceting": [
              "language",
              "version",
              "type",
              "docusaurus_tag"
            ],
            "attributesToRetrieve": [
              "hierarchy",
              "content",
              "anchor",
              "url",
              "url_without_anchor"
            ]
          },
          "conversation_id": [
            "833762294"
          ],
          "nb_hits": 46250
        }
      TYPESENSE_API_KEY: ${TYPESENSE_API_KEY}
      TYPESENSE_HOST: typesense
      TYPESENSE_PORT: 8108
      TYPESENSE_PROTOCOL: http
      SCRAPER_TARGET_HOST: ${SCRAPER_TARGET_HOST}
      SCRAPER_COLLECTION_INDEX: ${SCRAPER_COLLECTION_INDEX}
      REQUEST_FINGERPRINTER_IMPLEMENTATION: "2.7"
    command: python3 /app/src/docsearch.py
    restart: no

  scheduler:
    image: mcuadros/ofelia:latest
    networks:
      - dokploy-network
    depends_on:
      - docsearch-scraper
    command: daemon --docker
    volumes:
      - /var/run/docker.sock:/var/run/docker.sock:ro
    labels:
      ofelia.job-run.docsearch-scraper.schedule: "@every 5m"
      ofelia.job-run.docsearch-scraper.container: "docsearch-scraper"
    restart: unless-stopped

volumes:
  typesense-data:
Notice that we have introduced two new configuration properties in the YAML file:
networks: All containers are placed in the same Docker network, allowing them to communicate with each other internally without interruption.deploy.placement.constrains: We explicitly specify the node group where containers are deployed. This ensures that manager nodes are not overloaded with user workloads and allows future separation of workloads by introducing specialized worker pools, such as GPU or ARM-based nodes.
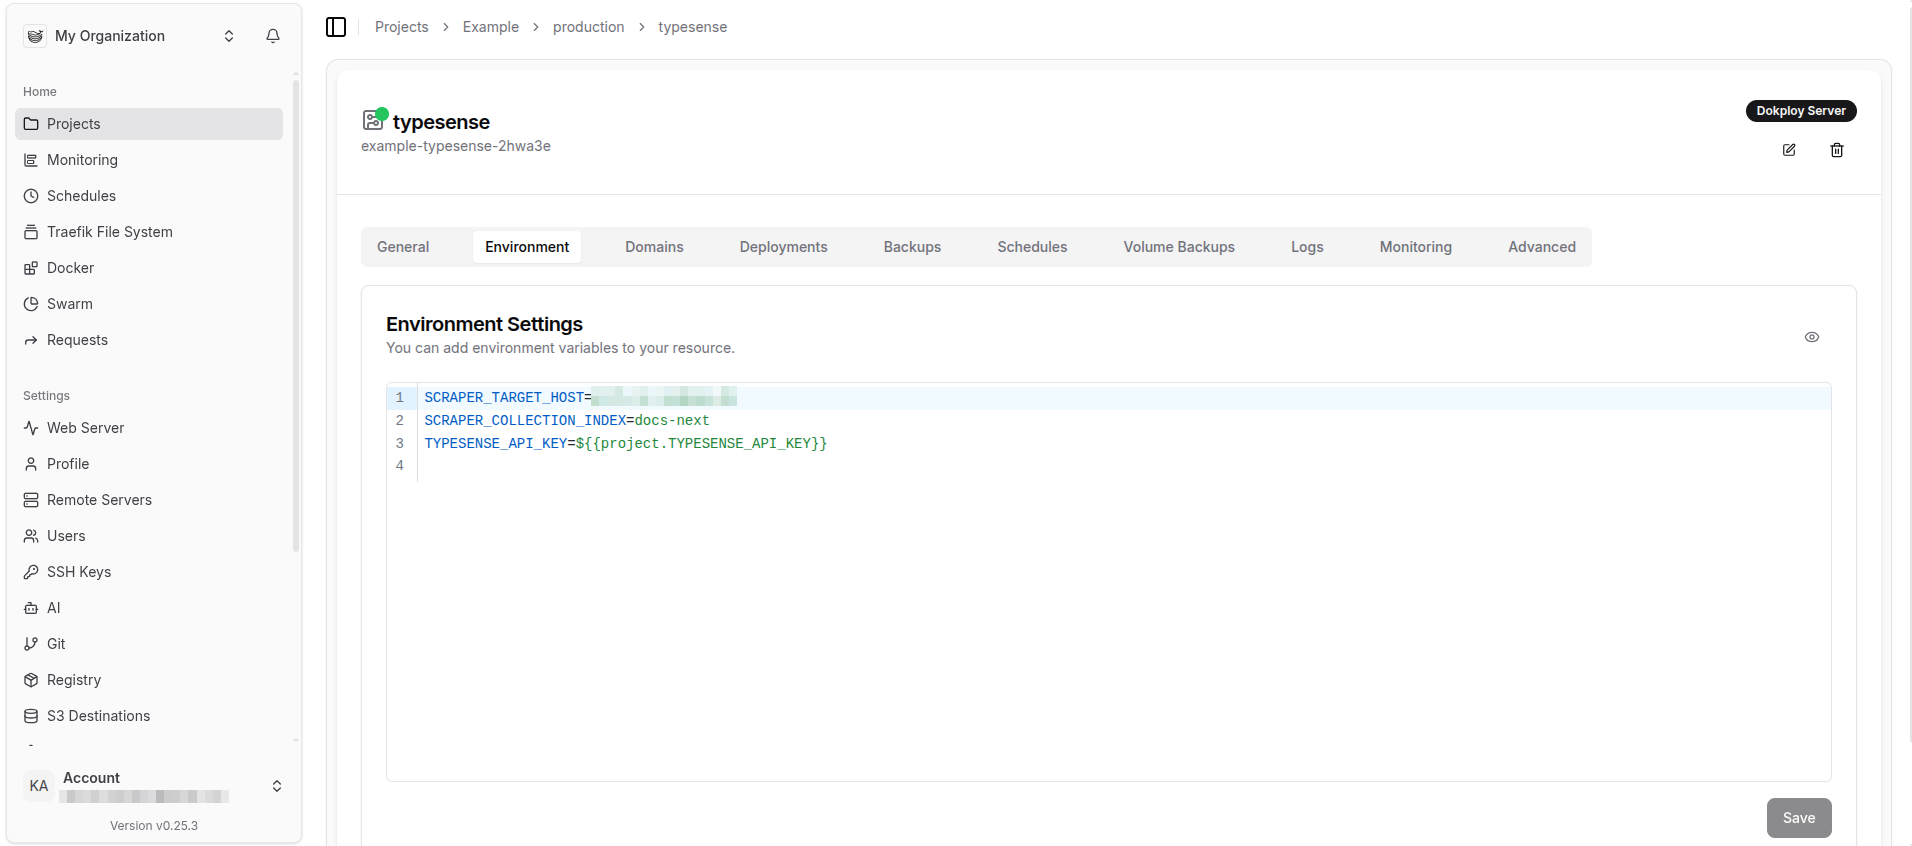
Next thing you need to do is set the environment variables required on project, environment or service level. For more details on how Dokploy is handling enviroment variables see Environment Variables in the official Dokploy documentation.
Then, go to Domains and create 2 domains. One for the typesense service (set Container Port to 8108), and one for the typesense-dashboard service ((set Container Port to 8108).

If the configuration is correct, all containers should be deployed on the worker nodes of the swarm and we could now visit the dashboard endpoint and observe our search engine collections and indices getting populated:

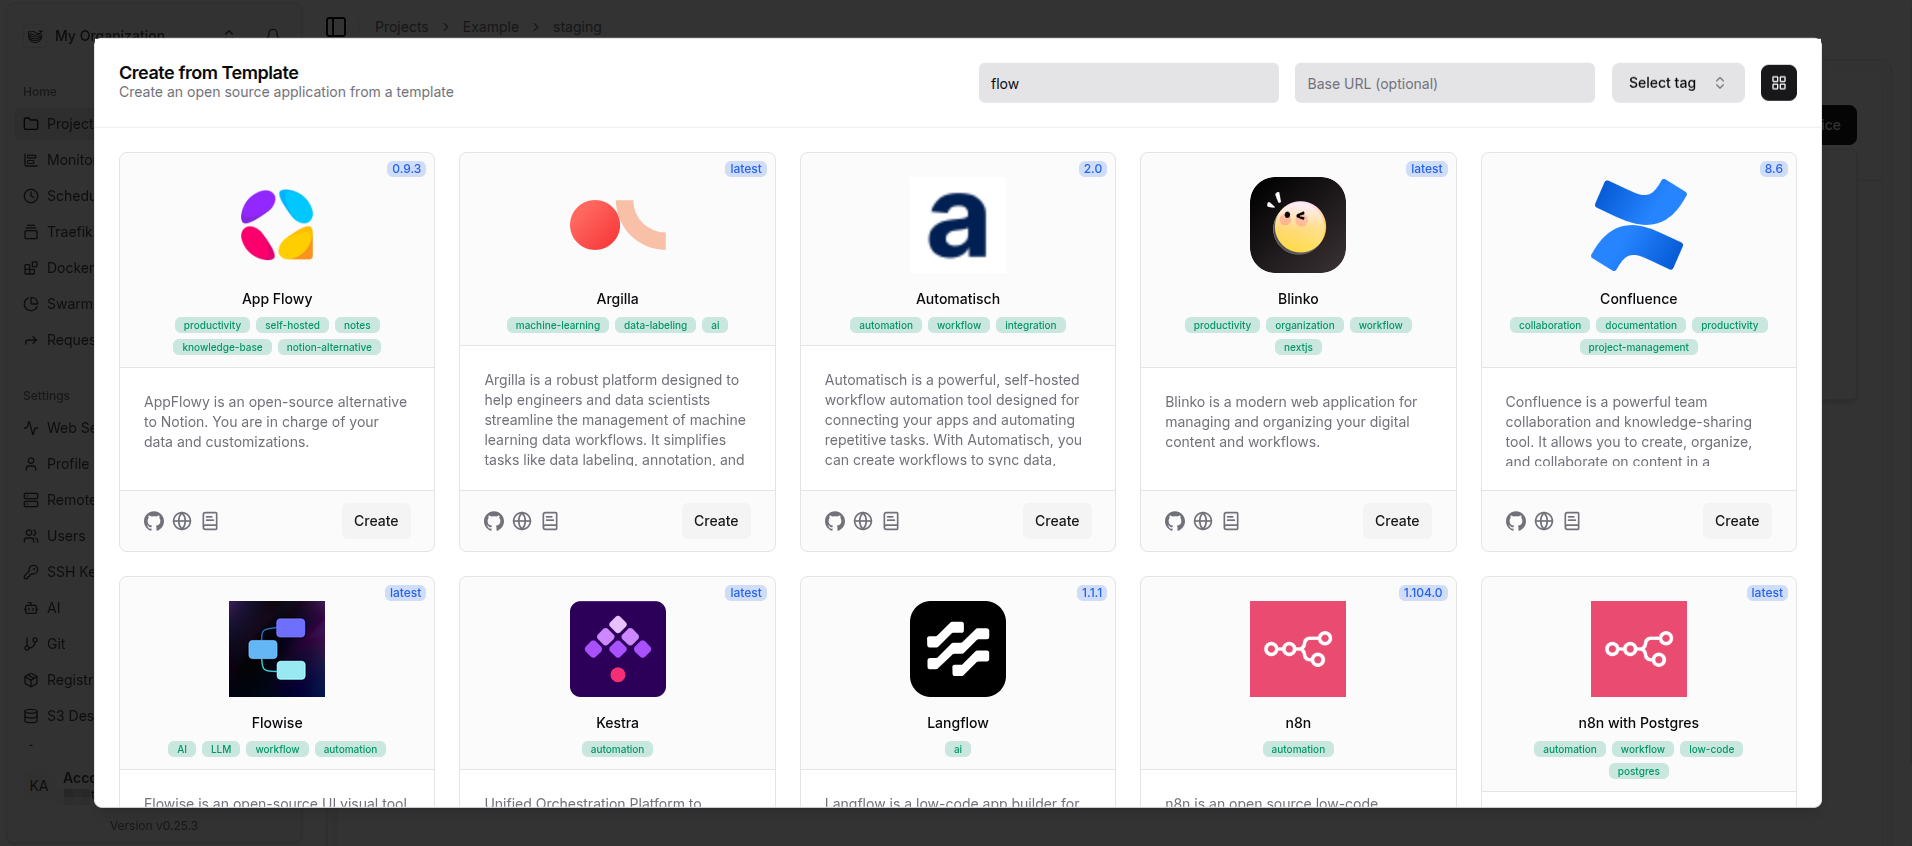
Deploying from a Dokploy Template
The Dokploy template library provides a collection of preconfigured application stacks that can be deployed with minimal setup. Templates cover common services such as databases, monitoring tools, and developer utilities, offering sensible defaults that reduce configuration effort and errors. They can be used directly for quick deployments or extended with custom settings for production environments. Teams may also add their own templates to the library to standardize and simplify application delivery across projects.
Most templates in the Dokploy library are designed for single-server setups. When running on Docker Swarm, you may need to adjust them to ensure they work reliably in a clustered environment.